Getting started
This page walks through a first working session in the Desk of Insurance Broker Core: open the Insurance Broker workspace, open the Insurance Broker Cockpit page, choose a company, and use the cards, charts, and lists to reach the records you work on. It does not change any data. Everything on the cockpit page is a read-only projection of records that live in their own DocTypes.
Who does this
Every user who is meant to see the cockpit. The cockpit page and the workspace are shown to these roles, and the cockpit API rejects every other role:
Insurance Broker AdministratorInsurance Broker OperationsInsurance Broker ManagerInsurance Broker AdvisorInsurance Broker ClaimsInsurance Broker ComplianceInsurance Broker ReconcilerInsurance Broker AuditorInsurance Broker Read Only
Roles are granted in standard ERPNext user administration; see Roles and access.
Before you start
- The app is installed and a company is configured. Installation and the activation gate are described in Installation and First steps and activation.
- Your user holds at least one of the roles above.
- Your user is allowed to see the company you want to work in. Users with the
System Managerrole and theAdministratoruser see every company. All other users see only the companies for which they hold a Company user permission; without one, the company list stays empty (see Roles and access).
Steps
1. Open the workspace
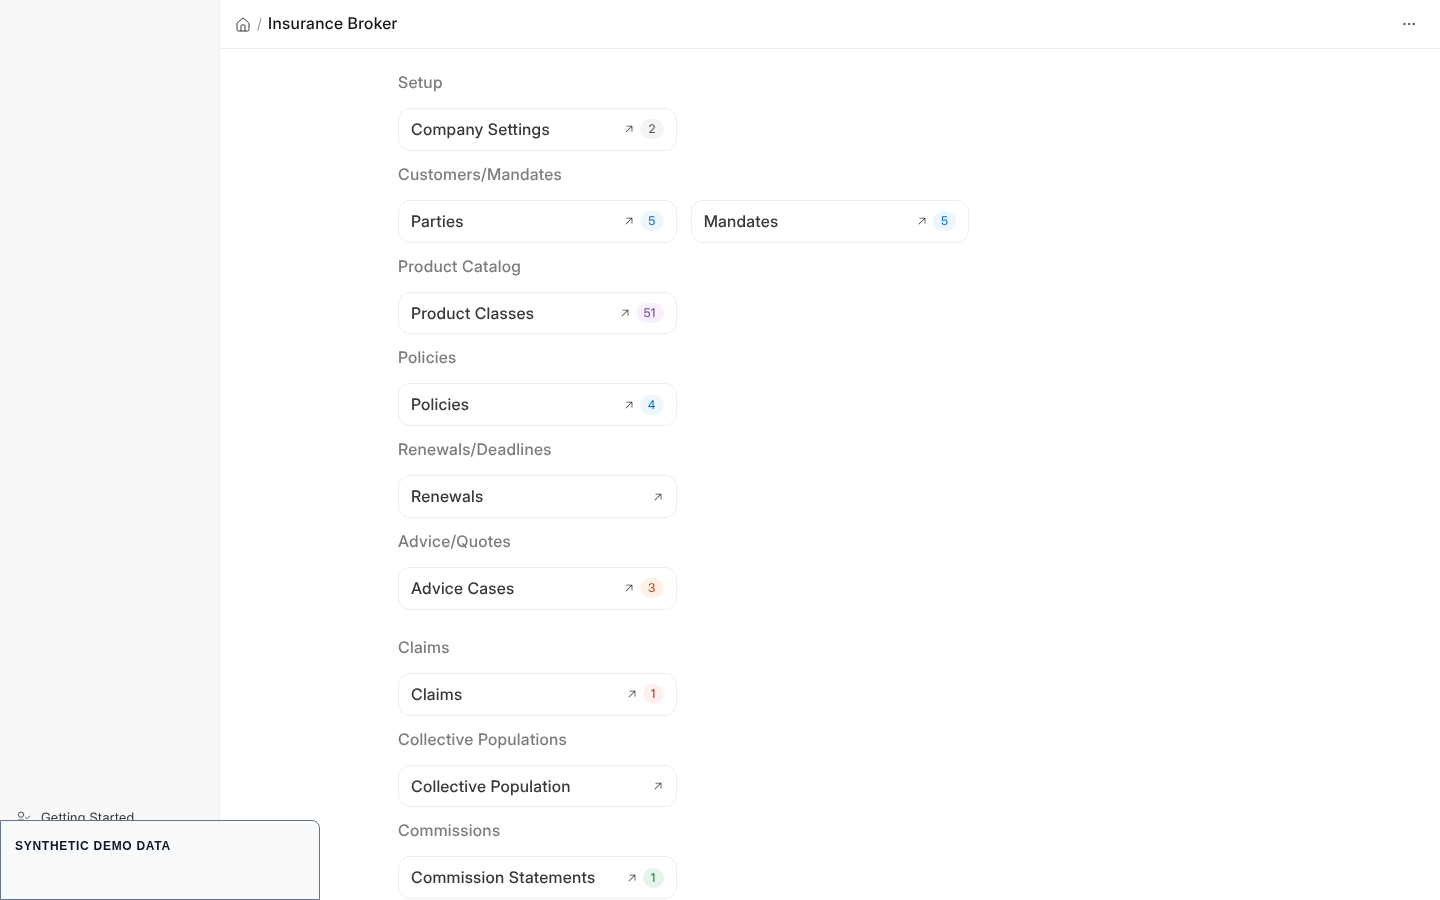
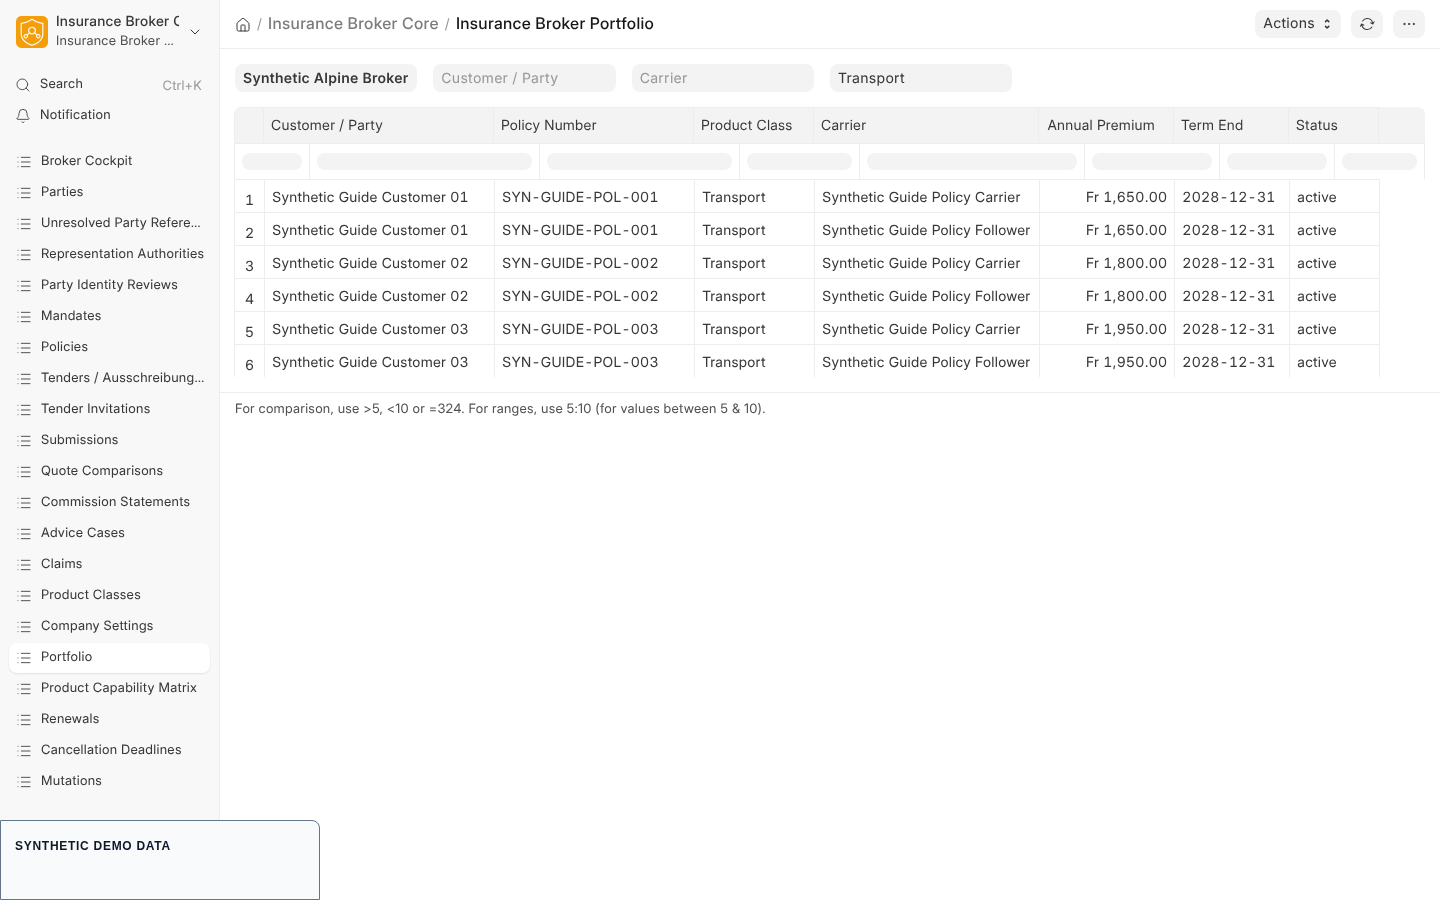
Open the Insurance Broker workspace. Its body is arranged in blocks: Setup, Customers/Mandates, Product Catalog, Policies, Renewals/Deadlines, Advice/Quotes, Claims, Collective Populations, Commissions, Imports/Data Quality, Privacy/Compliance, and Administration/Health. Each block holds shortcuts to a list, a report, or a page.
The workspace shortcuts you will use first:
| Shortcut | Opens |
|---|---|
| Broker Cockpit | the page Insurance Broker Cockpit |
| Parties | the list of Insurance Broker Party Identity |
| Mandates | the list of Insurance Broker Mandate |
| Policies | the list of Insurance Broker Policy |
| Product Classes | the list of Insurance Broker Product Class |
| Company Settings | the list of Insurance Broker Company Settings |
The module sidebar Insurance Broker Core carries the same entry points as links, including the reports (for example Portfolio, Product Capability Matrix, Renewals, and Disclosure Gaps) and the four tender entries Tenders / Ausschreibungen, Tender Invitations, Submissions, and Quote Comparisons. The tender entries open the tender records themselves; they are not a second copy of them.
If the sidebar looks older than the installed version after an upgrade, reload the Desk page once. A migration step merges missing workspace blocks, shortcuts, and sidebar links into the copy of the workspace stored on the site and keeps additions made on that site.
2. Open the cockpit
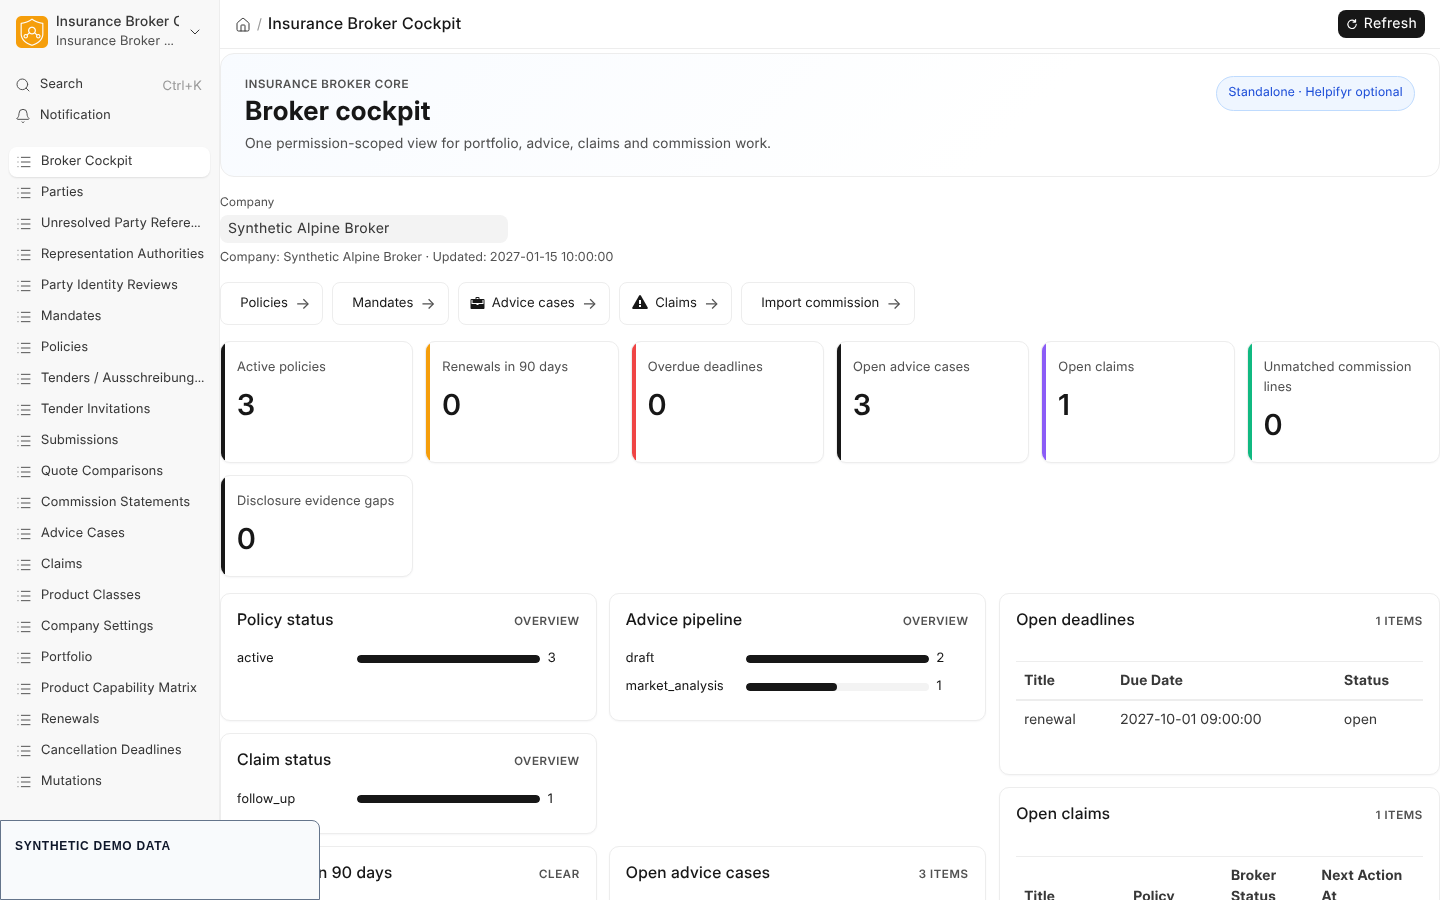
Select Broker Cockpit. The page is titled Insurance Broker Cockpit and shows the heading Broker cockpit with the badge "Standalone · Helpifyr optional". The cockpit works on its own; the optional Helpifyr integration is described in Helpifyr integration.
3. Choose a company
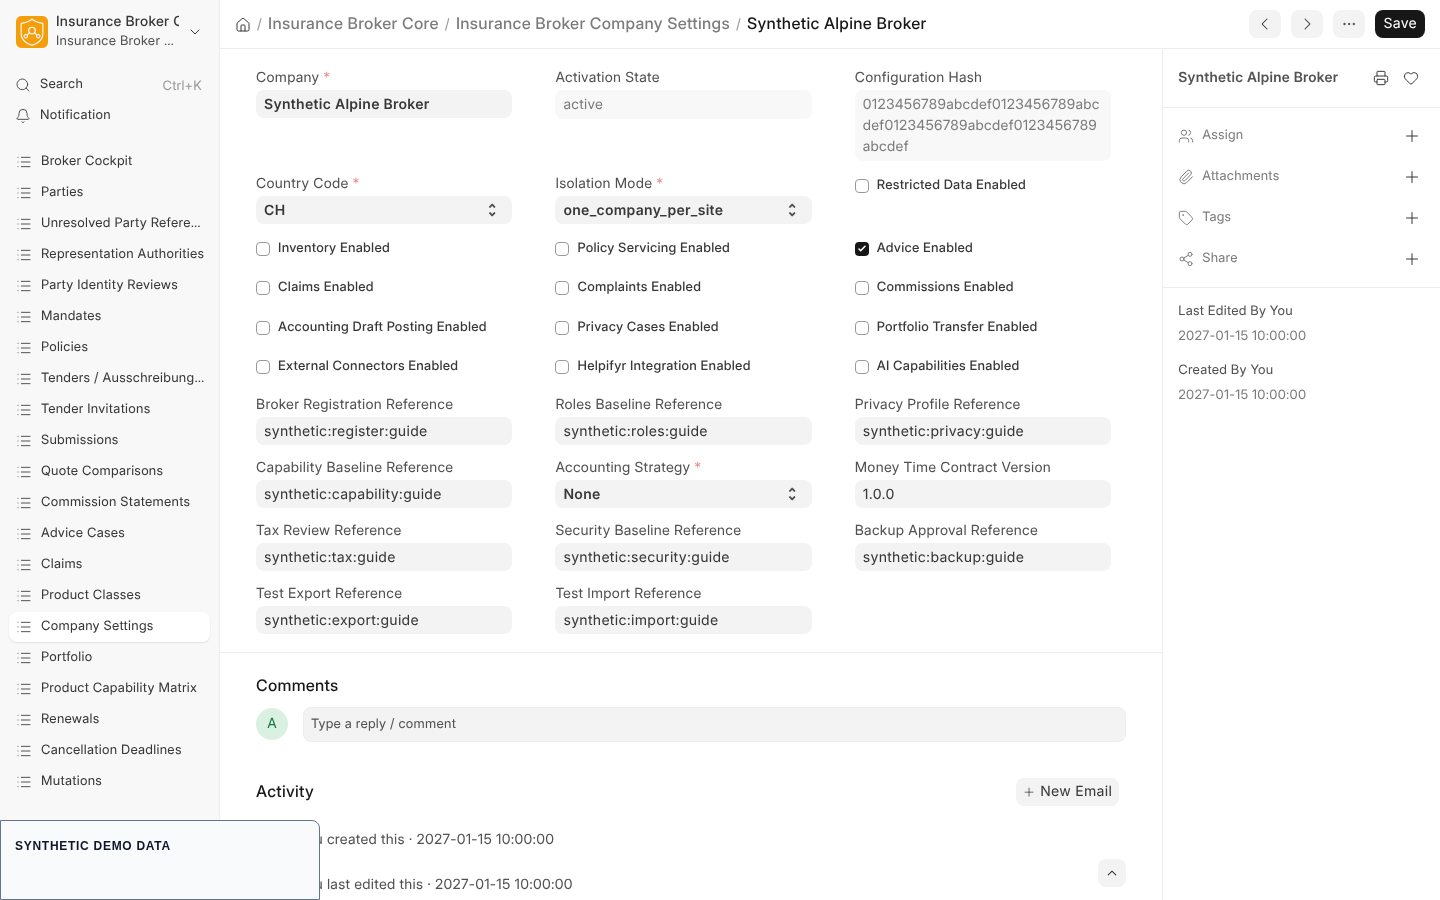
Demo-Zustand — synthetic configuration example; optional defaults are None. This screenshot is not a production default.
The toolbar has a Company dropdown with the first entry Select a company.
- If you may see exactly one company, the cockpit selects it for you.
- If you may see more than one company, the cockpit asks you to choose: the page shows "Select a company to load permission-scoped metrics." and stays empty until you pick one. This is deliberate, so that a card never silently adds up two legal entities.
- If the dropdown holds no company at all, your user has no Company user permission; ask your administrator.
After a company is chosen, the line under the toolbar shows the company and the time of the last read ("Company" and "Updated"). Select Refresh at the top of the page to read again.
4. Read the cards
Seven cards summarise the selected company:
| Card | What it counts |
|---|---|
| Active policies | Insurance Broker Policy records with status active |
| Renewals in 90 days | policy terms whose end date falls between today and 90 days ahead |
| Overdue deadlines | Insurance Broker Deadline records with status open, due, or overdue whose due date has passed |
| Open advice cases | Insurance Broker Advice Case records that are neither completed nor cancelled |
| Open claims | Insurance Broker Claim Assistance Case records whose broker status is not closed |
| Unmatched commission lines | Insurance Broker Commission Reconciliation records with status unmatched or exception |
| Disclosure evidence gaps | open advice cases without an initial disclosure or without delivery evidence on it |
The Open claims card shows Restricted instead of a number when your user has no read permission for Insurance Broker Claim Assistance Case. The same applies to the claim list and the Claim status chart: they are not loaded at all for such users.
5. Read the charts and lists
The charts show distributions as bars: Policy status, Advice pipeline, and, only for users who may read claims, Claim status.
The lists are bounded to eight rows each:
| Panel | Columns |
|---|---|
| Renewals in 90 days | Title, Customer / Party, Due Date, Status |
| Open advice cases | Title, Status, Started At |
| Open submissions | Title, Status, Submitted At |
| Open deadlines | Title, Due Date, Status |
| Open claims | Title, Policy, Broker Status, Next Action At |
| Commission exceptions | Title, Status, Difference Amount, Currency |
| Disclosure evidence gaps | Title, Status |
Select a row to open the authoritative record in its own form. An empty list shows "No data".
6. Use the quick actions
Above the cards, five buttons open the matching list view: Policies, Mandates, Advice cases, Claims, and Import commission (the commission statement import page).
Language of the Desk
English is the source language of the Desk. The app ships a German translation catalogue that covers the cockpit text, workspace and sidebar labels, validation messages, and the broker DocTypes; labels without a translation appear in English. The workspace shortcut Tenders / Ausschreibungen carries both languages in its English label by design. The 51 product classes are stored with German titles; see Product catalog. A Desk session in English can therefore show some German record titles next to English labels.
What the system checks
| Situation | Result |
|---|---|
| Your user holds none of the nine cockpit roles | the cockpit request is rejected with the message "You do not have permission to run this insurance report." |
| You name a company you may not see | the request is rejected with "You do not have access to this company." |
| The cockpit cannot be loaded | the page shows "The cockpit could not be loaded. Check your Company permission." and an error message |
What this page does not cover
- The cockpit does not create or change records. Work happens in the forms reached from the lists.
- Activation of the app and of a company is an administrator task: see First steps and activation.
- Row counts on the cockpit are bounded by a small row limit. Use the list views and reports for full lists and exports.